A home cinema is the one room in a Dubai villa where the finish you can see matters least. What separates a genuine cinema from an expensive TV room you can hear three doors away is everything hidden behind the fabric walls — the acoustic treatment, the decoupled construction, the AV rack and its cooling, the tiered floor build. Get those right and the screen and seating are the easy part. This guide walks the decisions in the order you actually make them.
Start with the room shape, not the kit
Before a single speaker or seat is specified, the room's proportions decide how it will sound. The enemy is parallel surfaces and dimensions that share a common multiple, because they reinforce the same frequencies and produce boomy, uneven bass. Avoid a cube: a room measuring 5 × 5 × 3 m stacks its resonances on top of each other, so aim for dimensions that don't divide neatly — ratios around 1 : 1.6 : 2.3 (height : width : length) are a well-established starting point. Where the shell forces two hard parallel walls, angle the acoustic panelling slightly so the surfaces are no longer perfectly opposed — this kills the flutter echo you hear when you clap in an untreated room.
Most Dubai villa floors give you 3.0 to 3.6 m slab-to-slab; after a floating floor and an acoustic ceiling raft you may land near 2.7 m finished, comfortable for two tiered rows. A room roughly 6.5 m long by 4.2 m wide is a reliable footprint for an eight-seat, two-row cinema in a mid-to-large villa.
Acoustics: treating the room you have
Acoustic treatment is about controlling reflections so dialogue stays intelligible and the surround field is precise. It is not the same as soundproofing — treatment shapes the sound inside the room, isolation stops it leaving. You need both, and they are different products doing different jobs.
Absorption at the reflection points
The critical surfaces are the first-reflection points — the spots on the side walls, front wall and ceiling where sound from the front speakers bounces straight to the primary seats. Treat these with 50 to 100 mm mineral-wool or polyester absorption panels wrapped in acoustically transparent fabric. Thicker panels absorb lower into the midrange, so treat the front wall behind the screen heavily to stop it smearing dialogue.
Bass traps in the corners
Low frequencies pile up in the corners of every room, tri-corners worst of all. Fit floor-to-ceiling bass traps — 200 to 400 mm of dense absorption, or purpose-built tuned traps — in all four vertical corners and, ideally, along the wall-ceiling edges. This is the single biggest lever on how tight the bass feels; skipping it is why so many home cinemas sound boomy no matter how good the subwoofer is. Don't overdo the treatment, though — balance the absorptive front third against a diffusive rear wall (timber diffusers behind the back row) so the room doesn't go dead.
Soundproofing: keeping the film in the room
In a villa, the cinema is often below or beside bedrooms, and low-frequency energy is relentless — an explosion at reference level will rattle a headboard two rooms away through the structure alone. Isolation is built, not bought, and it rests on three principles: mass, decoupling and sealing.
- Mass: two layers of 12.5 to 15 mm acoustic plasterboard on each wall face, with a viscoelastic damping compound between them, sharply raise the wall's resistance to sound transmission.
- Decoupling: break the direct structural path. A double-stud wall with an air gap, or a single stud line on resilient (isolation) channel or sound clips, stops vibration crossing from the inner leaf to the villa structure. This is what tames bass, which mass alone cannot.
- A floating floor: build the finished cinema floor on rubber isolation pucks or an isolation cradle system, mechanically separated from the slab, so footfall and subwoofer energy don't couple into the building.
- The acoustic door: a standard door is the weakest link — a heavy solid-core or purpose-built acoustic door set (rated around Rw 40–45 dB) with perimeter compression seals and an automatic drop seal at the threshold. For serious isolation, an acoustic lobby with two doors in series is the gold standard.
- Seal every penetration: ductwork, cable conduits, downlight housings and sockets are all leaks. Use acoustic sealant, back-boxes and lined ducting; a single unsealed gap undoes a wall's worth of mass.
Treat the wall shared with the nearest bedroom most aggressively, and don't forget the ceiling — an independently framed ceiling on resilient hangers matters as much as the walls when there is a bedroom above.
The screen decision: projector or LED wall
This is the choice clients ask about first, and it comes down to how dark and how dedicated the room is.
4K laser projector plus screen
For a true light-controlled cinema, a 4K laser projector remains the best value and the biggest image — a genuinely cinematic 120 to 150 inch picture at a fraction of an equivalent LED wall. Key specifications:
- Throw distance: match the projector's throw ratio to the room. For a 130 inch (2.9 m wide) 16:9 image, a projector with a 1.5 : 1 throw ratio sits roughly 4.3 m back — comfortable in a 6.5 m-long room, ceiling-mounted behind the rear row.
- Screen type: in a fully dark room a matte-white acoustically transparent screen (with the centre and surround speakers behind it) is ideal. If the room takes any ambient light, an ALR (ambient-light-rejecting) screen holds contrast far better. Laser phosphor engines give 20,000+ hours of consistent brightness with no lamp changes.
Micro-LED / direct-view LED wall
A direct-view LED or micro-LED wall delivers reference brightness and perfect black-level uniformity, and it holds a punchy image even with the lights up. Choose it when the room doubles as a bright media lounge, or when budget is not the constraint — an LED wall is several times the cost of a projector setup at the same size, and it runs hot and heavy. The honest rule: dedicated dark room → projector; bright multi-use media room → LED. Most villa cinemas are the former.
Tiered seating and sightlines
Two rows means the back row must see the bottom of the screen over the heads in front. This is riser geometry, and it is worth getting exactly right — a flat second row spends the whole film craning.
- Riser height: raise the rear row by 30 to 45 cm. As a rule of thumb, each row should sit high enough that a seated viewer's eyeline clears the row in front by roughly 10 to 13 cm.
- Row spacing: allow 1.6 to 1.9 m from the front of one row's seat to the front of the next, so a fully reclined chair in the back row still has walking clearance behind it.
- Front row distance: the closest seats should sit no nearer than about 1.5 × the screen width (roughly 4.3 m for a 2.9 m-wide image) so the picture fills the field of view without forcing the eye across the whole frame. Mount the screen so its centre lands near seated eye height for the primary seats.
Recliner dimensions
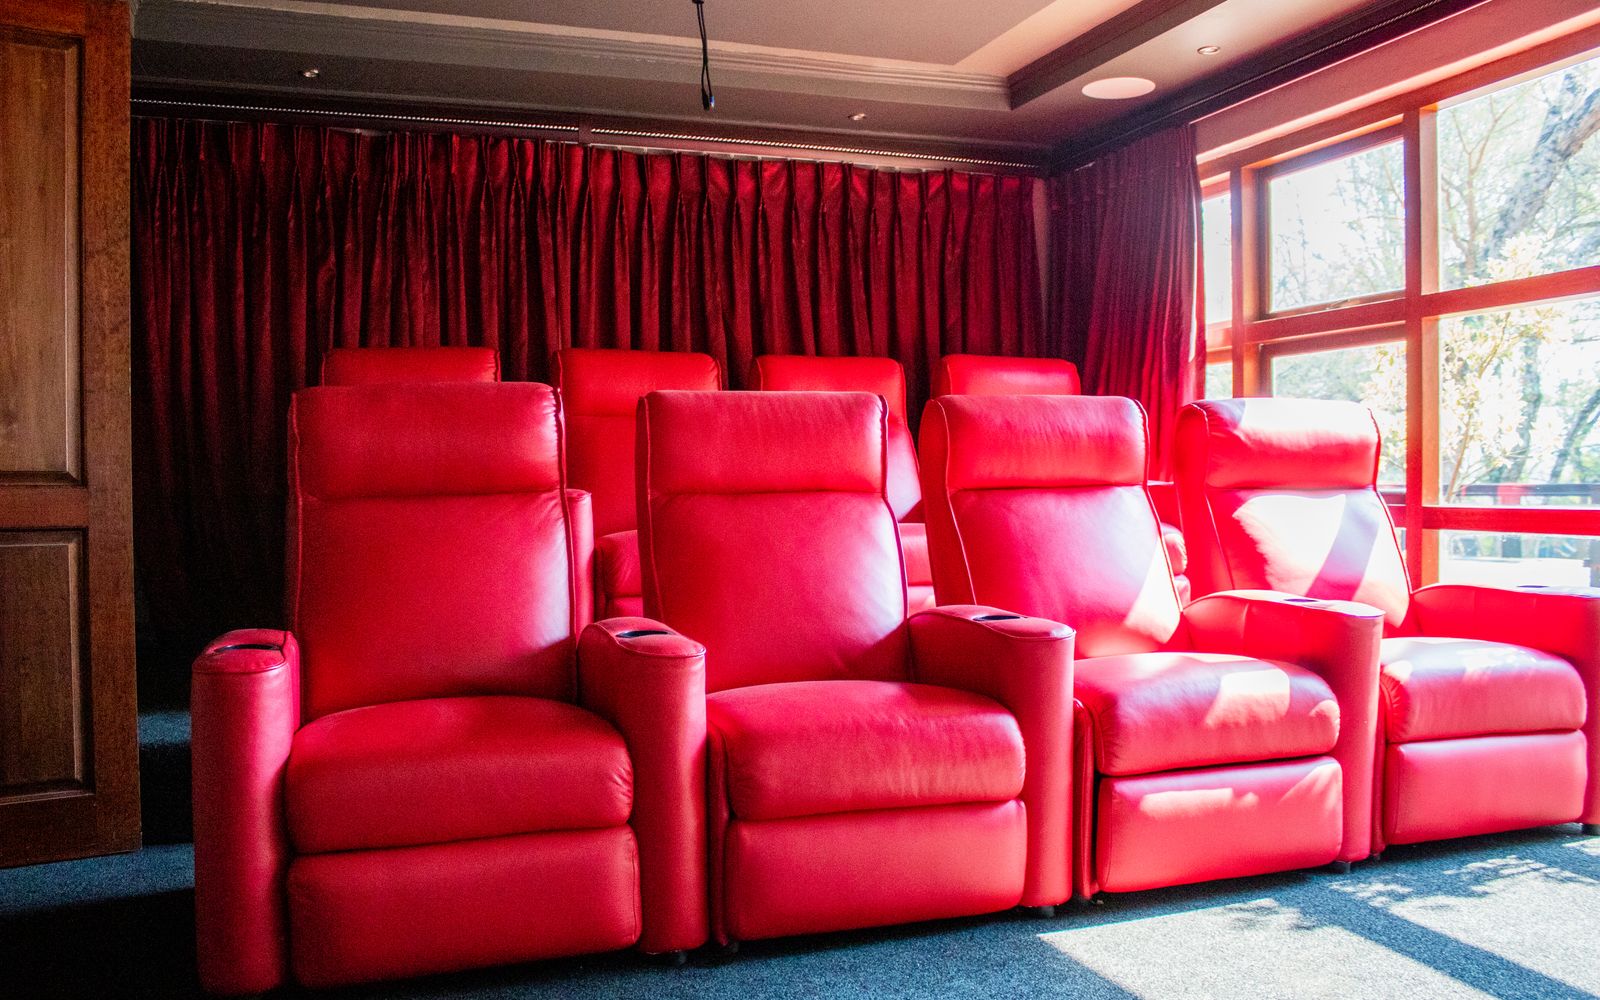
Motorised cinema recliners are generous, and you must plan the room around their real footprint, not their upright width:
- Seat width: 55 to 70 cm per seat plus armrests — a two-seater with a shared centre arm runs around 1.5 to 1.7 m wide.
- Depth: roughly 90 cm upright, 165 to 185 cm fully reclined once the footrest and headrest extend — this reclined travel is what dictates row spacing.
- Wall clearance: if the back row reclines against a wall, leave 15 to 25 cm for the backrest to tilt, or specify wall-hugger mechanisms. Keep a 60 cm minimum walkway to each seat.
Bespoke seating lets you match the upholstery, integrate riser plinths and specify high-density foam that survives long sessions — our custom furniture team builds cinema seating and riser platforms as one coordinated element.
Lighting: dark, but never black
Cinema lighting is layered and fully scene-controlled — bright enough to walk in safely, almost dark for the film, with warm accents that never spill onto the screen.
- Bias lighting: a soft strip behind the screen washing the front wall at low output reduces eye fatigue and makes on-screen black look deeper by giving the eye a reference. Around 6500K reads as neutral contrast.
- Step and aisle lighting: recessed warm LED markers on the riser face and along walkways so guests move safely during the film without any light reaching the screen.
- Star-fibre ceiling: the signature cinema flourish — hundreds of pinpoint fibres in a dark absorptive panel, driven by one concealed light engine, twinkling optionally, with no glare.
- Dimmable scenes: everything on a lighting control system (Lutron or equivalent) with pre-set scenes — Entry (bright), Trailers (mid), Feature (bias and steps only), Clean-up (full). All warm sources at 2700–3000K, all dimmable to 1% without flicker.
For the wider approach to layering and scene control across the villa, see our guide to lighting design for luxury Dubai homes.
The AV rack, cooling and cable infrastructure
The electronics generate heat and noise, and both are the enemy of a cinema. The single most important infrastructure decision is to get the rack out of the room — house the receiver, processor, amplifiers and power conditioning in a ventilated cupboard or rack room, so their fan noise never intrudes.
- Rack cooling: a stack of amplifiers can dissipate well over a kilowatt as heat. Provide thermostatically controlled extraction on the cupboard — a quiet in-line fan venting to a corridor — and leave ventilation gaps. A sealed cupboard cooks the equipment in Dubai's ambient heat.
- Cable infrastructure: pull conduit, not loose cable. Run fibre or certified HDMI to the projector, speaker cabling to every location (including height and rear surround for Atmos-style object audio), and CAT6/6A for control, with spare draw-ropes for later.
- Power and control: a dedicated clean circuit for the rack with surge protection, enough outlets at every seat cluster, and a single control system that ties the projector, lighting scenes, blinds and HVAC into one interface. Plan it before first fix, not after.
Tying the cinema into the wider home system — so one scene dims the lights, drops the screen and closes the blinds — is exactly the kind of coordination we cover in smart home integration for Dubai villas.
Quiet HVAC and the Dubai climate
A room full of people and hot electronics, sealed for isolation, will overheat fast — and in a Dubai summer the cooling has to work hard while staying silent. Standard ducted AC is usually too noisy for a reference cinema, where the whoosh of air ruins quiet passages. The fix is an oversized, low-velocity supply: move the required air through larger, acoustically lined ducts at lower speed so it enters quietly, with acoustic plenum boxes at the grilles and duct silencers in the supply and return runs — those attenuators double as sound-proofing, closing the flanking path ducts would otherwise open to the rest of the villa. Keep supply and return away from the seating and the screen wall so moving air never disturbs an acoustically transparent screen. Size the cooling for a full room plus the heat the AV kit throws off, not the empty-room load — a full cinema at reference level is a meaningful heat source before you even count Dubai's 50°C summer ambient.
Materials: dark, matte and sound-friendly
Every surface should either absorb sound or avoid reflecting light — this is where the room finally looks like a cinema. Walls are acoustically transparent fabric over absorption in deep, dark tones (charcoal, aubergine, midnight blue) that disappear when the lights drop. The ceiling is dark, matte and absorptive, the natural home for the star-fibre feature and safe from projector spill. Underfoot, heavy wool carpet on a dense underlay over the floating floor kills footstep noise even in a villa that is hard-floored elsewhere. Keep glass, mirror and lacquer out of the room; for richness, use matte timber, leather and fabric.
The build-order checklist
- Confirm room proportions; break up parallel/cube geometry before construction
- Build isolation first — decoupled walls and ceiling, floating floor, acoustic door(s), every penetration sealed
- First-fix all conduit, speaker cabling, HDMI/fibre and clean power before boarding out
- Decide screen strategy (projector vs LED wall) and set throw, size and screen height
- Set riser height and row spacing to the recliner's reclined footprint
- Treat first-reflection points and corners — absorption up front, bass traps in every corner, diffusion at the rear
- Locate the AV rack outside the room with dedicated, quiet extraction cooling
- Specify low-velocity, acoustically lined HVAC with silencers, diffusers away from screen and seats
- Programme lighting scenes — bias, step, star ceiling — all warm and dimmable to 1%
- Finish in dark, matte, absorptive materials with carpet underfoot
The bottom line
A home cinema rewards the money you spend where you can't see it. Proportion the room, isolate it properly, treat the acoustics, and get the rack and its heat out of the way — do that and a projector, a screen and a row of recliners deliver a genuinely cinematic evening that never disturbs the sleeping half of the house. Design the shell right once, and it performs for the life of the villa.
If you are planning a dedicated cinema or converting a media room, our team handles acoustic design, isolation construction, bespoke seating and full AV integration from our Al Qusais workshop. Book a consultation at the showroom or on site at your villa.
Designing a home cinema?
Book a complimentary cinema design consultation. We'll assess your room, plan the acoustics, isolation and seating, and return a complete design with an indicative budget within two weeks.
Book a Consultation